korkitchen
A fun group of #atx Yelp elites stopped by the @kor180 studio this week to try out classes. I wanted to present them with some dessert after their hard work….but what would pack a protein punch, taste amazing & offer the photogenic quality sought after by yelpers everywhere?
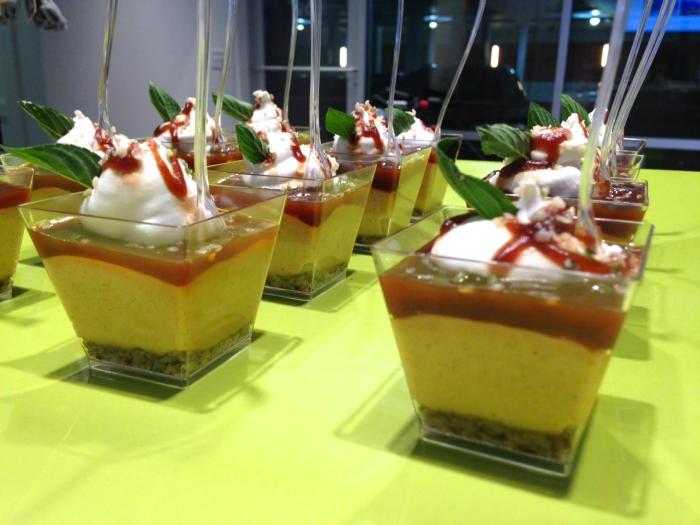
Voila…#vegan Pumpkin Cheesecake Cups.
Hemp & pumpkin seed crust + pumpkin & cashew filling + apple butter + vegan whipped cream
I use 2 oz. clear cups with a modern flair for presentation. Find cups like this at your local party store!
For the crust
- 1 C raw pumpkin seeds
- 1/2 C raw hemp seeds
- 4 organic medjool dates
- 1/2 t pumpkin pie spice
How To
1. Place all ingredients into a food processor & pulse until the crust comes together. Think of the dates as your glue. They must be evenly mixed together with the other ingredients for the perfect nut crust.
2. Press 1-2 teaspoons of crust into the bottom of your individual serving containers. Press & form the crust so it sits evenly on the bottom. (You can always opt for a full size cheesecake here. Just press the crust into the bottom of small springform pan)
3. Refrigerate the crust while you prepare the filling.
For the filling
- 2 C organic cashews, soaked in filtered water for 4 hours
- 1/4 C organic pumpkin puree
- 1/2 C coconut oil, melted
- 1/4 C local honey
- 1/4 C coconut milk
- 1 1/2 t pumpkin pie spice
- 1 t vanilla extract
1. The cashews are HUGE in the success of this recipe. Make sure they have been soaked for a minimum of 4 hours. If you don’t have that kind of time you can always boil water & pour it over your cashews. (second best option) This is a hot soak & will bring overall soaking time down to about an hour.
2. When the cashews are ready to go simply add all ingredients above into a high-power blender. It takes 1-2 minutes for the filling to come together. If it seems to be too thick you can add a bit more coconut milk, 1 tbsp at a time. You want the filling to still be nice & think but have a very creamy texture.
3. Once you’ve acquired the desired texture (rub a bit of the filling between your index finger & your thumb. If you feel any grittiness, keep blending.), pour the cheesecake mixture over your crust in each individual serving cup, filling it about 3/4 of the way full. We’re almost done…but let the cheesecakes chill in the fridge, as they are, for at least 1 hour. Then it’s time to top & taste!
4. I finish each cheesecake with some locally made organic apple butter & a bit of coconut whipped cream.
Enjoy this recipe & tweet us pictures if you make it at home!

